RAC体系为系统扩容开创了一条新的道路:只需要不断向集群Cluster中加入新的服务器就可以了。这里我们就来介绍一下如何为10g RAC Cluster增加节点;实际上这并不复杂,甚至可以说是很简单的。为现有的Oracle 10g RAC添加节点大致包括以下步骤:
- 配置新的服务器节点上的硬件及操作系统环境
- 向Cluster集群中加入该节点
- 在新节点上安装Oracle Database software
- 为新的节点配置监听器LISTENER
- 通过DBCA为新的节点添加实例
我们假设当前RAC环境中存在2个节点,分别为vrh1和vrh2;该RAC环境中clusterware和database的版本均为10.2.0.4,需要加入该Cluster的新节点为vrh3。
一、在新的服务器节点上配置操作系统环境
- 这包括配置该节点今后使用的public network公用网络和private network接口,不要忘记在hosts文件中加入之前节点的网络信息,并将该份完整的hosts文件传到集群Cluster中已有的节点上,保证处处可以访问
- 同时需要在原有的基础上配置oracle(或其他DBA)用户的身份等价性,这需要将新节点上生成的id_rsa.pub和id_dsa.pub文件中的信息追加到authorized_keys文件中,并保证在所有节点上均有这样一份相同的authorized_keys文件
- 调整新节点上的操作系统内核参数,保证其满足今后在该节点上运行实例的内存要求以及10g RAC Cluster的推荐的udp网络参数
- 调整新节点上的系统时间以保持同其他节点一致,或者配置NTP服务
- 保证原有Cluster中所有节点上的CRS都正常运行,否则addNode时会报错
- 配置clusterware和database软件的安装目录,要求路径和原有节点上的一致
二.向Rac Cluster中加入新的节点
1.在原有RAC节点上(vrh1)以oracle用户身份登录,设置合理的DISPLAY显示环境变量,并运行$ORA_CRS_HOME/oui/bin目录下的addNode.sh脚本
[oracle@vrh1 ~]$ export DISPLAY=IP:0.0
[oracle@vrh1 ~]$ cd $ORA_CRS_HOME/oui/bin
[oracle@vrh1 bin]$ ./addNode.sh
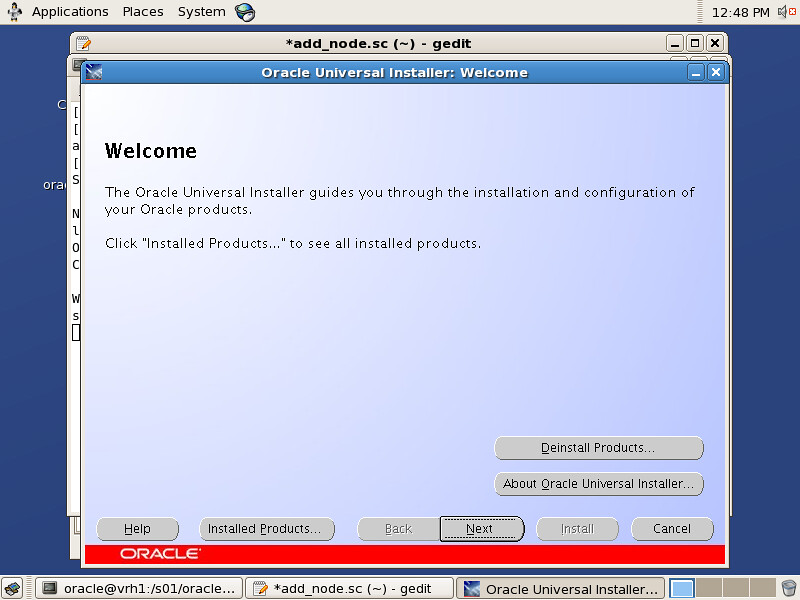
2.若OUI被正常调用则会出现欢迎界面,并点击NEXT:
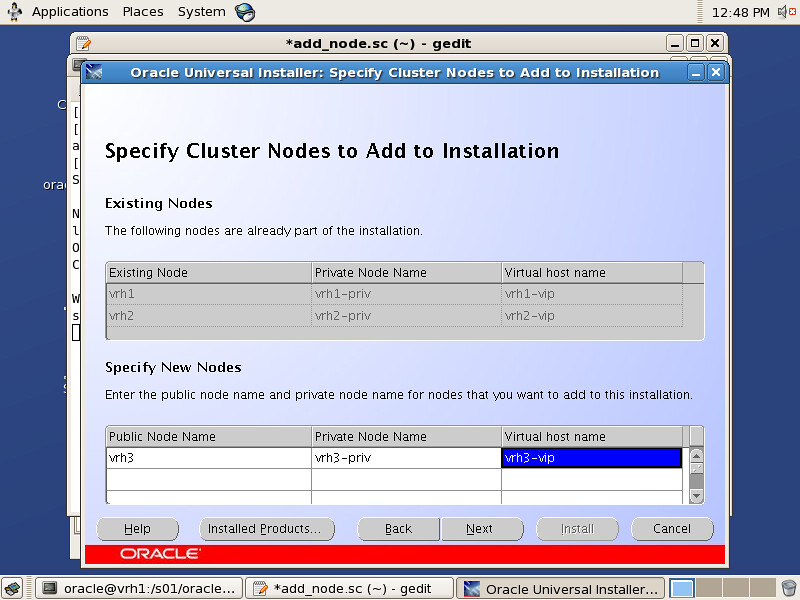
3.在"Specify Cluster Nodes to Add to Installation"界面下输入公共节点名、私有节点名和VIP节点名(之前应当在所有节点的/etc/hosts文件中都配置了):
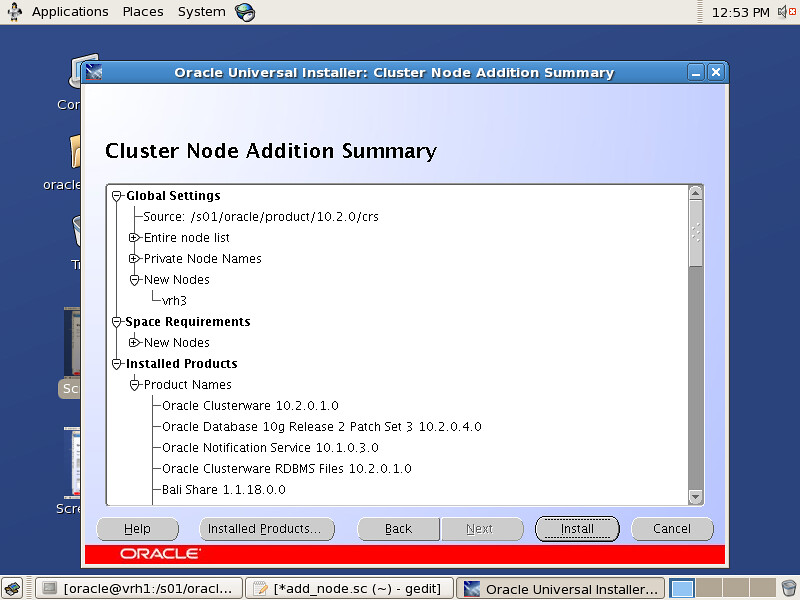
4.出现"Cluster Node Addition Summary"界面Review一遍Summary信息,并点击NEXT:
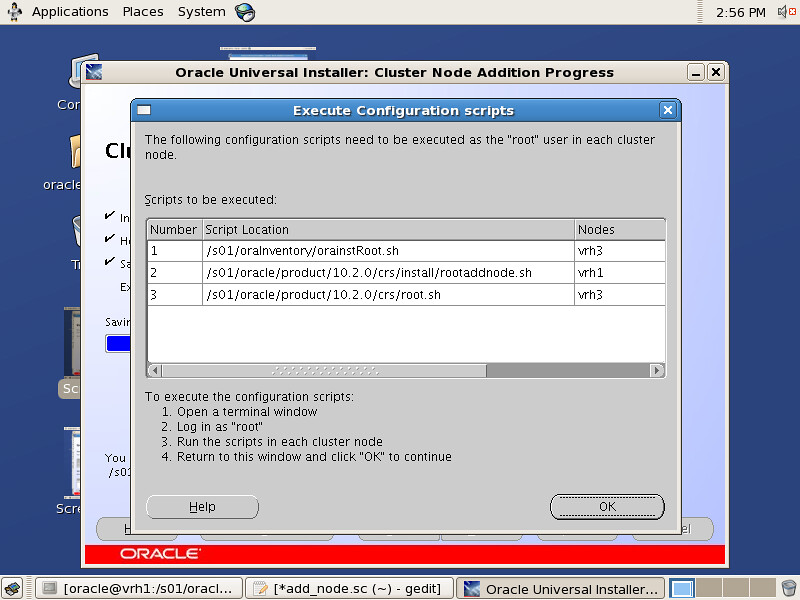
5.出现"Cluster Node Addition Progress"界面,OUI成功将安装好的clusterware软件传输到新的节点后,会提示用户运行多个脚本包括:orainstRoot.sh(新节点)、rootaddnode.sh(运行OUI的原有节点)、root.sh(新节点):
6.运行之前提示的三个脚本:
/* 在新节点上运行orainstRoot.sh脚本 */

[root@vrh3 ~]# /s01/oraInventory/orainstRoot.sh
Changing permissions of /s01/oraInventory to 770.
Changing groupname of /s01/oraInventory to oinstall.
The execution of the script is complete

/* 在运行OUI的原有节点上运行rootaddnode.sh脚本 */

[root@vrh1 ~]# /s01/oracle/product/10.2.0/crs/install/rootaddnode.sh
clscfg: EXISTING configuration version 3 detected.
clscfg: version 3 is 10G Release 2.
Attempting to add 1 new nodes to the configuration
Using ports: CSS=49895 CRS=49896 EVMC=49898 and EVMR=49897.
node {nodenumber}: {nodename} {private interconnect name} {hostname}
node 3: vrh3 vrh3-priv vrh3
Creating OCR keys for user 'root', privgrp 'root'..
Operation successful.
/s01/oracle/product/10.2.0/crs/bin/srvctl add nodeapps -n vrh3 -A vrh3-vip/255.255.255.0/eth0 -o /s01/oracle/product/10.2.0/crs

/* 在新节点上运行root.sh脚本 */

[root@vrh3 ~]# /s01/oracle/product/10.2.0/crs/root.sh
WARNING: directory '/s01/oracle/product/10.2.0' is not owned by root
WARNING: directory '/s01/oracle/product' is not owned by root
WARNING: directory '/s01/oracle' is not owned by root
WARNING: directory '/s01' is not owned by root
Checking to see if Oracle CRS stack is already configured
/etc/oracle does not exist. Creating it now.
OCR LOCATIONS =  /dev/raw/raw1
OCR backup directory '/s01/oracle/product/10.2.0/crs/cdata/crs' does not exist. Creating now
Setting the permissions on OCR backup directory
Setting up NS directories
Oracle Cluster Registry configuration upgraded successfully
WARNING: directory '/s01/oracle/product/10.2.0' is not owned by root
WARNING: directory '/s01/oracle/product' is not owned by root
WARNING: directory '/s01/oracle' is not owned by root
WARNING: directory '/s01' is not owned by root
clscfg: EXISTING configuration version 3 detected.
clscfg: version 3 is 10G Release 2.
Successfully accumulated necessary OCR keys.
Using ports: CSS=49895 CRS=49896 EVMC=49898 and EVMR=49897.
node {nodenumber}: {nodename} {private interconnect name} {hostname}
node 1: vrh1 vrh1-priv vrh1
node 2: vrh2 vrh2-priv vrh2
clscfg: Arguments check out successfully.

NO KEYS WERE WRITTEN. Supply -force parameter to override.
-force is destructive and will destroy any previous cluster
configuration.
Oracle Cluster Registry for cluster has already been initialized
Startup will be queued to init within 30 seconds.
Adding daemons to inittab
Expecting the CRS daemons to be up within 600 seconds.
CSS is active on these nodes.
        vrh1
        vrh2
        vrh3
CSS is active on all nodes.
Waiting for the Oracle CRSD and EVMD to start
Oracle CRS stack installed and running under init(1M)
Running vipca(silent) for configuring nodeapps

Creating VIP application resource on (0) nodes.
Creating GSD application resource on (2) nodes...
Creating ONS application resource on (2) nodes...
Starting VIP application resource on (2) nodes...
Starting GSD application resource on (2) nodes...
Starting ONS application resource on (2) nodes...
Done.
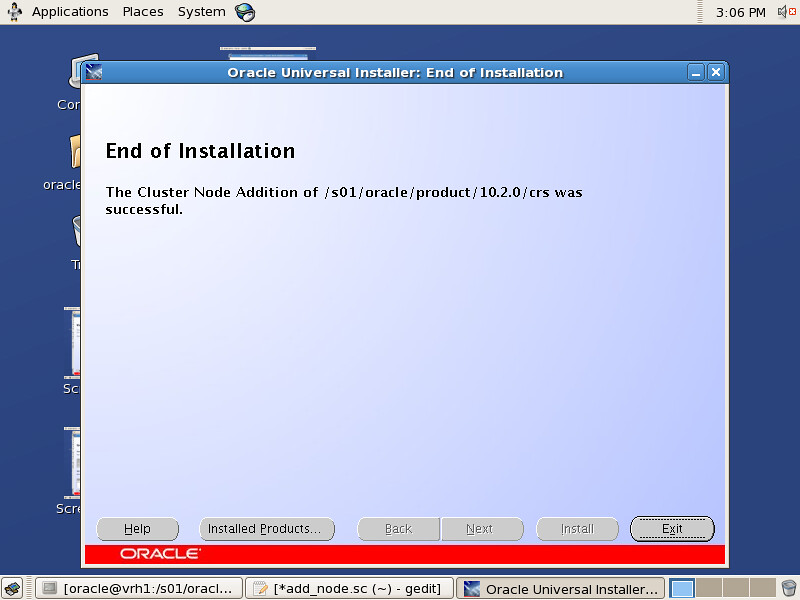
7.运行完成以上脚本后回到OUI界面点选OK,出现安装成功界面:
三.在新节点上安装Oracle Database software
1.在原有RAC节点上以Oracle用户身份登录,设置合理的DISPLAY显示环境变量,并运行$ORACLE_HOME/oui/bin目录下的addNode.sh脚本:
[oracle@vrh1 ~]$ export DISPLAY=IP:0.0

[oracle@vrh1 ~]$ cd $ORACLE_HOME/oui/bin
[oracle@vrh1 bin]$ ./addNode.sh
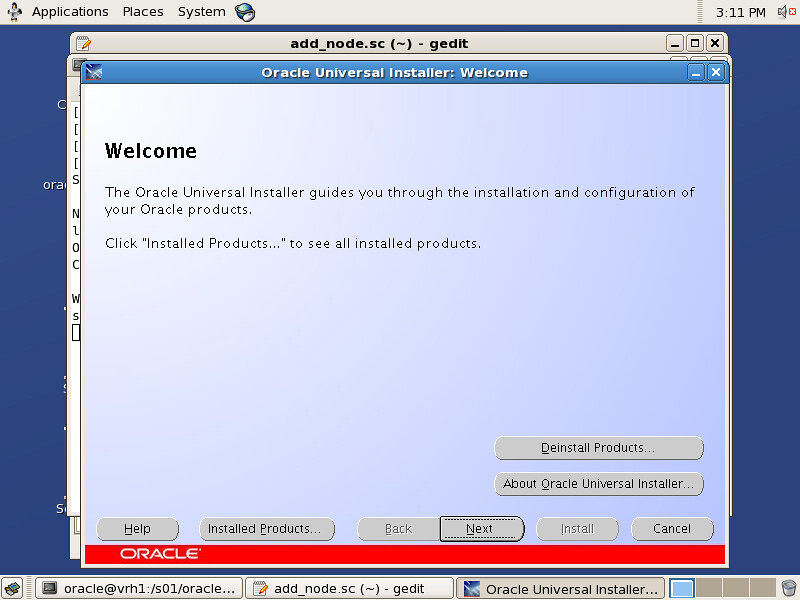
2.若OUI被正常调用则会出现欢迎界面,并点击NEXT:
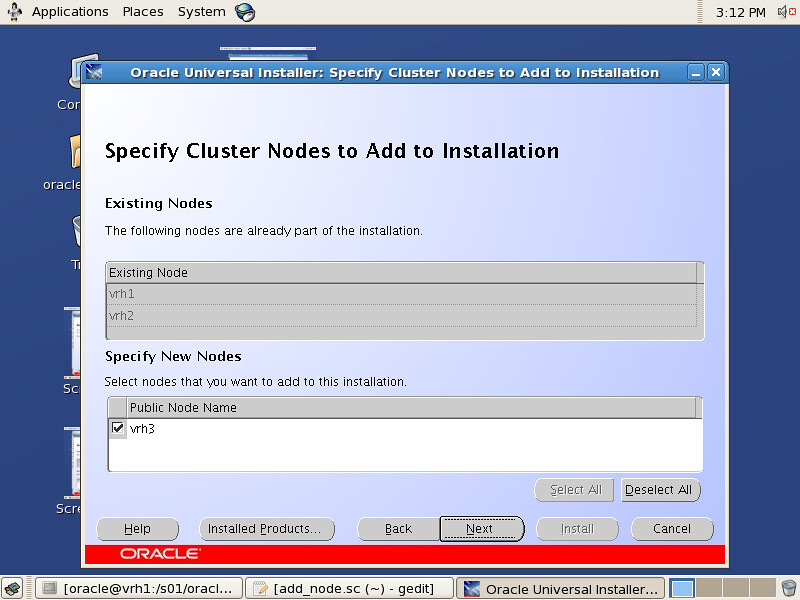
3.在"Specify Cluster Nodes to Add to Installation“界面中勾选需要安装Oracle Database software数据库软件的节点,这里为vrh3:
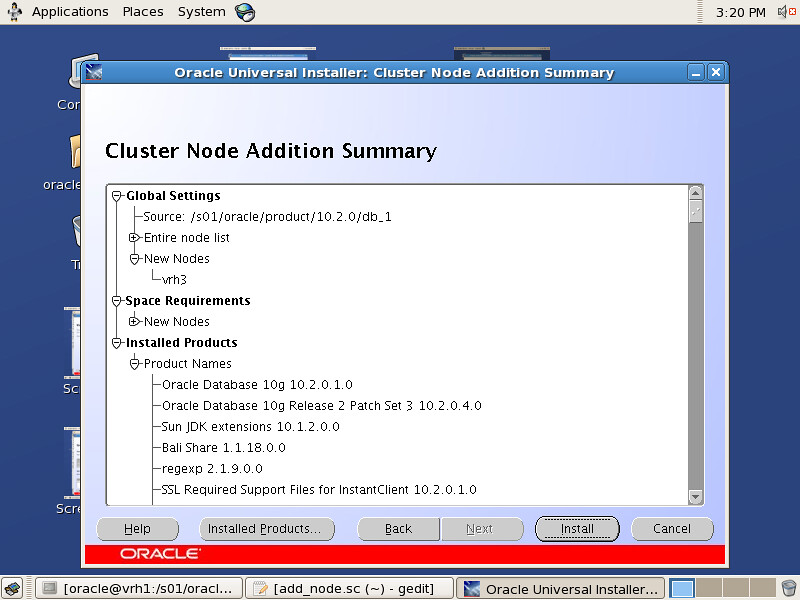
4.出现"Cluster Node Addition Summary"界面,review一遍安装Summary后点击Next:
5.出现"Cluster Node Addition Progress"进度条界面,完成对Oracle database Software的远程传输安装后会提示用户运行root.sh脚本:
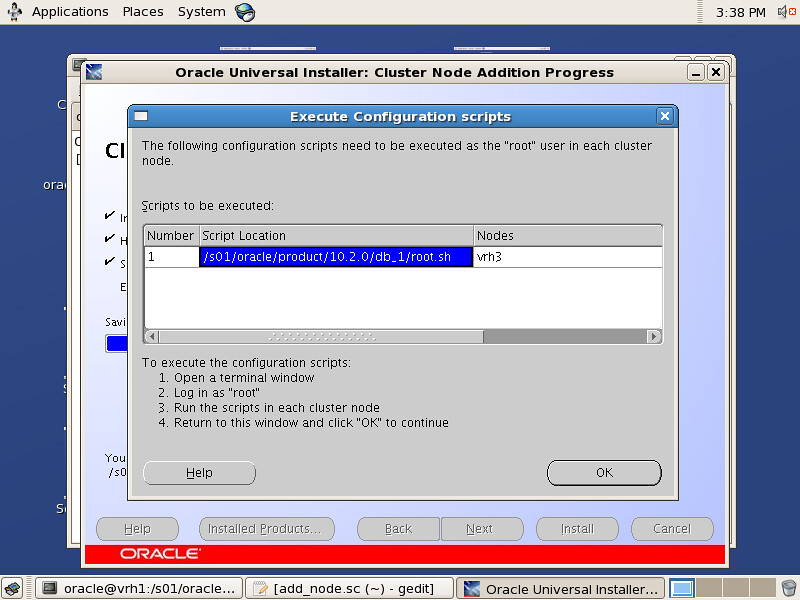
6.在新的节点(这里为vrh3)上运行提示脚本root.sh
四.在新的节点(vrh3)上使用netca工具配置监听器LISTENER,不做展开
五.使用DBCA工具在新节点上添加实例
1.在原有RAC节点上以Oracle用户身份登录,设置合理的DISPLAY显示环境变量,并运行DBCA命令:
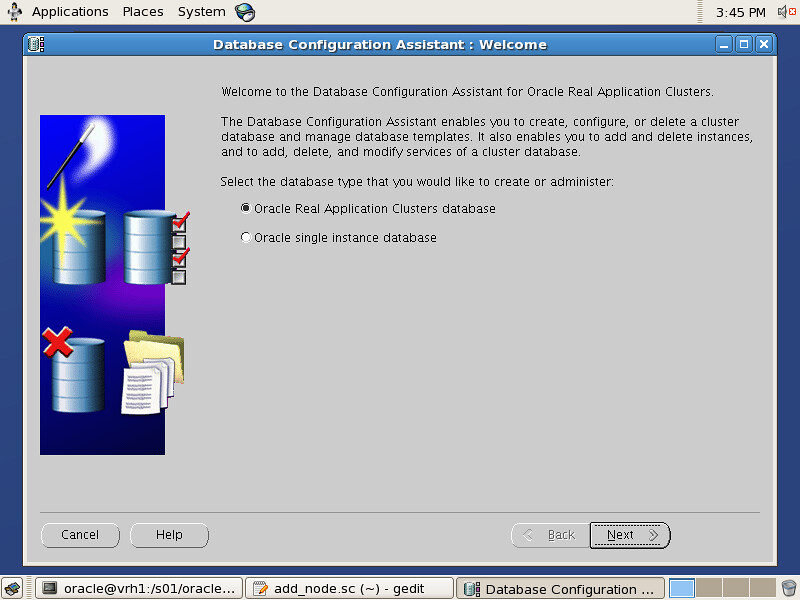
2.出现DBCA欢迎界面,选择"Oracle Real Application Clusters"并点击Next:
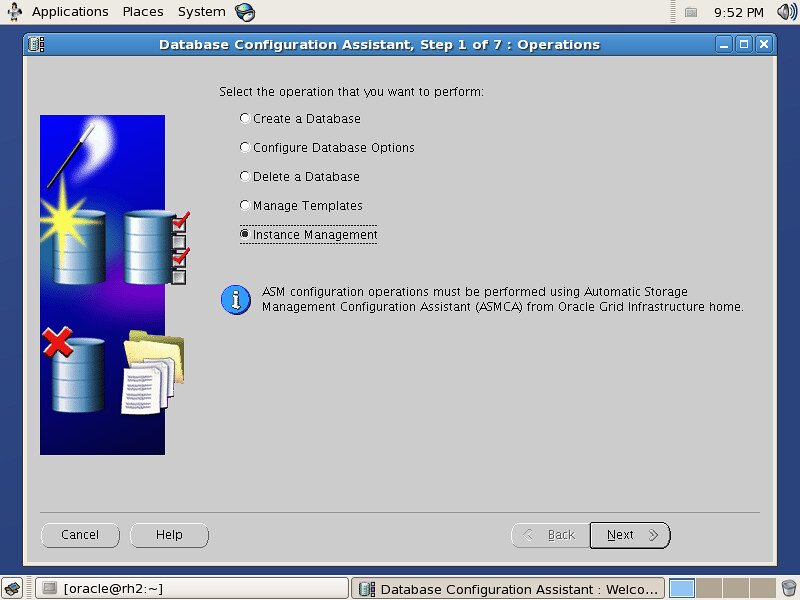
3.勾选节点管理,并点击Next:
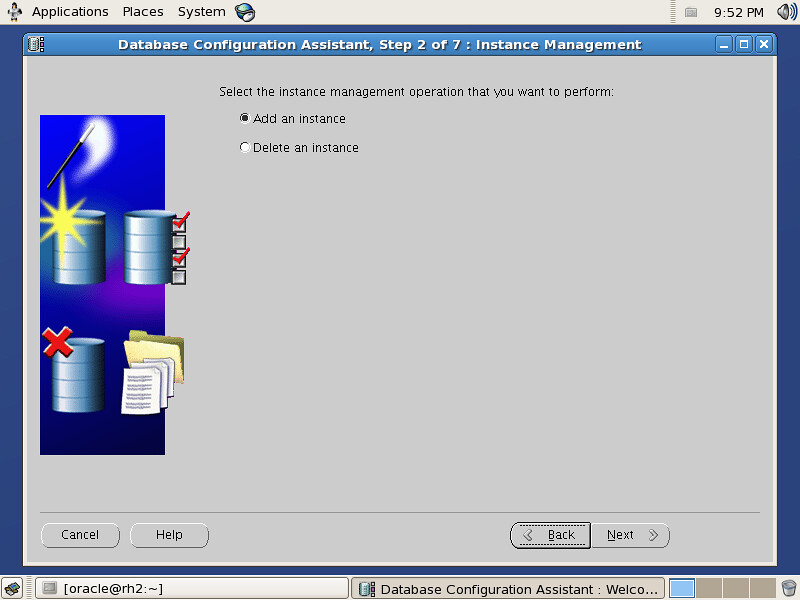
4.勾选"Add an instance"增加节点,并点击Next:
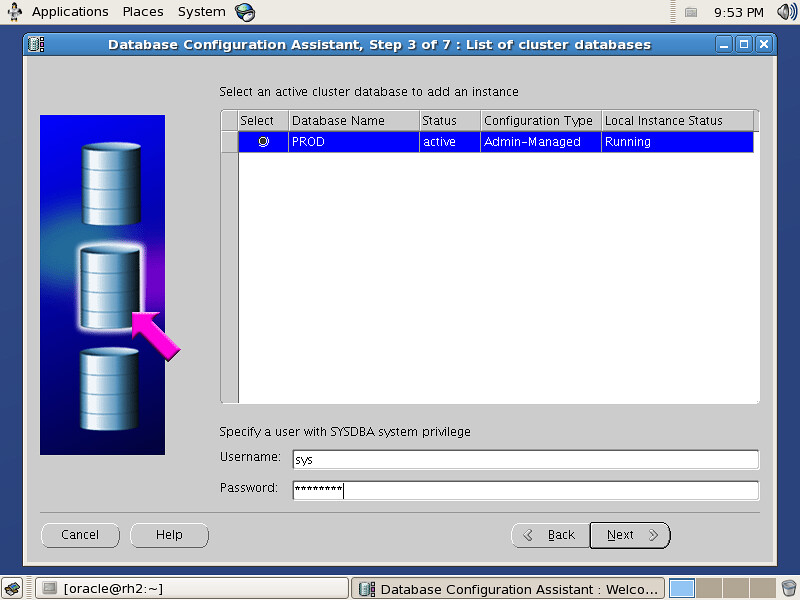
5.勾选想要添加实例的数据库并填写SYSDBA用户信息密码:
6.勾选正确的实例名和节点,并点击Next
7.Review Storage存储信息,并点击Next
8.Review Summary信息,并点击OK
9.等待进度条完成,当被提示是否执行另一操作"perform another operation"时选择No
10.进一步通过查询gv$instance视图验证节点是否添加成功,若添加成功则当可以看到所有的节点信息。
 3.在"Specify Cluster Nodes to Add to Installation"界面下输入公共节点名、私有节点名和VIP节点名(之前应当在所有节点的/etc/hosts文件中都配置了):
 4.出现"Cluster Node Addition Summary"界面Review一遍Summary信息,并点击NEXT:
 5.出现"Cluster Node Addition Progress"界面,OUI成功将安装好的clusterware软件传输到新的节点后,会提示用户运行多个脚本包括:orainstRoot.sh(新节点)、rootaddnode.sh(运行OUI的原有节点)、root.sh(新节点):
 6.运行之前提示的三个脚本:
 三.在新节点上安装Oracle Database software
1.在原有RAC节点上以Oracle用户身份登录,设置合理的DISPLAY显示环境变量,并运行$ORACLE_HOME/oui/bin目录下的addNode.sh脚本:
 3.在"Specify Cluster Nodes to Add to Installation“界面中勾选需要安装Oracle Database software数据库软件的节点,这里为vrh3:
 4.出现"Cluster Node Addition Summary"界面,review一遍安装Summary后点击Next:
 5.出现"Cluster Node Addition Progress"进度条界面,完成对Oracle database Software的远程传输安装后会提示用户运行root.sh脚本:
 6.在新的节点(这里为vrh3)上运行提示脚本root.sh
四.在新的节点(vrh3)上使用netca工具配置监听器LISTENER,不做展开
五.使用DBCA工具在新节点上添加实例
1.在原有RAC节点上以Oracle用户身份登录,设置合理的DISPLAY显示环境变量,并运行DBCA命令:
2.出现DBCA欢迎界面,选择"Oracle Real Application Clusters"并点击Next:
 3.勾选节点管理,并点击Next:
 4.勾选"Add an instance"增加节点,并点击Next:
 5.勾选想要添加实例的数据库并填写SYSDBA用户信息密码:
 6.勾选正确的实例名和节点,并点击Next
7.Review Storage存储信息,并点击Next
8.Review Summary信息,并点击OK
9.等待进度条完成,当被提示是否执行另一操作"perform another operation"时选择No
10.进一步通过查询gv$instance视图验证节点是否添加成功,若添加成功则当可以看到所有的节点信息。